Description of slider fields
Title/Headline Box: The title of your slider. You can use any phrases, words or characters. Avoid using the same title twice as that will cause problems. You can use commas, apostrophes, quotes, hyphens/dashes and other typical symbols in the slider.
Description: Text featured on the slider. 150 character limit.
Link URL: Where your visitors should be navigated to when they click the slider. This can be a post, a page or an external URL.
Button Text: Text to ask your visitors to interact with your slider (i.e. learn more, read more, apply now).

Preview: Allows you to view the slider before officially publishing it. 
Publish box: Contains buttons that control the state of your slider. The main states are Published, Pending Review and Draft. A Published status means the slider has been published live on your blog for all to see. Pending Review means the draft is waiting for review by an editor prior to publication. Draft means the slider has not been published and remains a draft for you. If you select a specific publish status and click the update slider or “Publish” button, that status is applied to the slider. For example, to save a slider in the Pending Review status, select Pending Review from the Publish Status drop-down box, and click Save As Pending. To schedule a slider for publication on a future time or date, click “Edit” in the Publish area next to the words “Publish immediately”. You can also change the publish date to a date in the past to back-date sliders. Change the settings to the desired time and date. You must also hit the “Publish” button when you have completed the slider to publish at the desired time and date. Visibility determines how your slider appears to the world. Public sliders will be visible to all website visitors once published. Password Protected sliders are published to all, but visitors must know the password to view the slider content. Private sliders are visible only to you (and to other editors or admins within your site).
Publish: Publishes your slider on the site. You can edit the time when the slider is published by clicking the Edit link above the “Publish” button and specifying the time you want the slider to be published. By default, at the time the slider is first auto-saved, that will be the date and time of the slider within the database.
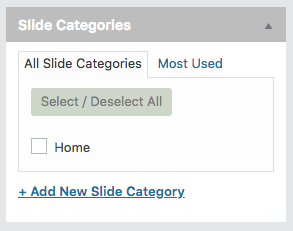
Slide Categories: Utilized on sites with more than one slider location. On your Chapter Site, you will always choose Home because there is only one slider location.
How to make a slider
Step 1: Log in to your chapter site.
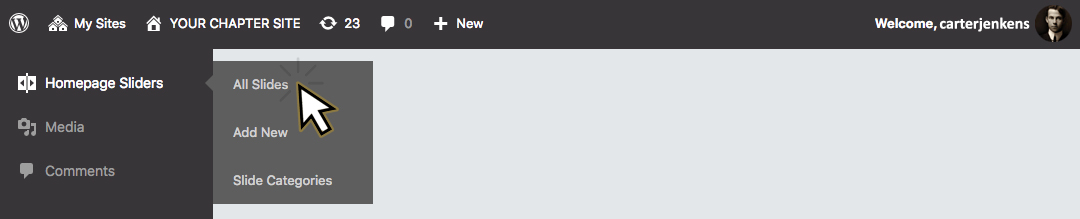
Step 2: Find Homepage Sliders on the side menu. Click All Slides.
Step 3: Click Add New.
Step 4: Start filling in the blanks: enter your post title in the upper field, select the order, add a description, enter the URL you would like the slider to link to, and update the button text.
Step 5: Click Add Image. If you have pre-cropped an image to 2000 x 667 skip to Step 6.
Cropping an image to 2000 x 667
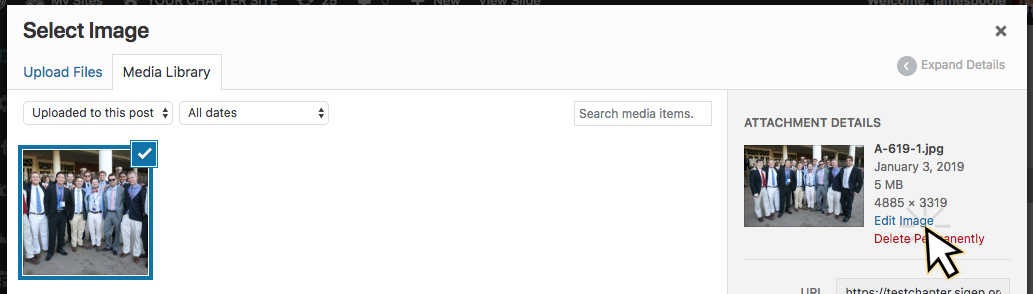
Step 5.1: Select the image in the Media Library. Click Edit Image on the right side of the screen.
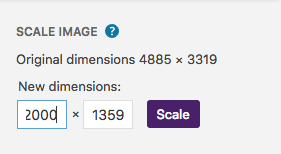
Step 5.2: If the image is larger than 2000 pixels wide, type 2000 into the width (leave height as is). Click Scale.
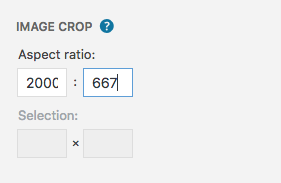
Step 5.3: Type 2000 x 667 into the Image Crop.
Step 5.4: Click and hold to draw a crop path across the image. Click the crop button ![]() in the menu bar.
in the menu bar.
Step 5.5: Click Save. Click Select.
Step 6: Select Home, under Slide Categories.
Step 7: When you are ready, click Publish.
Best practices for sliders
Focus on the most important chapter initiatives: Sliders work as a quick way to navigate site visitors. A good place to start is one for recruitment forms (Balanced Man Scholarship), one for your most recent, and one to direct donors to the donor page.
Spell Check and Proof: Some serious writers will write their posts in a text editor with spell check, check all the spelling and proof it thoroughly before copying and pasting it into chapter sites. When in doubt, a second set of eyes never hurts.
Think before you post: Remember, once it is out there, it can be seen by many and crawled by search engines; and taking things back is harder once it is public. Take a moment to read what you’ve written before hitting the Publish button. When you are ready, share it with the world.
Use quality pictures: High-quality photos are a must for sliders to build confidence in your visitors and keep them coming back for more content. If you don’t have a picture, investigate purchasing photos or using free stock images. Never use images without permission.
Keep your sliders fresh: Swap your sliders frequently to give your visitors a new and fresh experience. Don’t let outdated sliders stay up past their relevance.
Save your sliders: Save your sliders before you press the publish button. Anything can happen with your computer or with an internet connection. You don’t need to lose your slider.